 Chromebooks are awesome machines, but they only really shine when coupled with a robust internet connection. If you’re a faculty, staff, or student using a Chromebook at UAF, you should be on the faster and auto-authenticating eduroam network, not UAlaska. The authentication process is straightforward but does take a few steps.
Before you start make sure you have internet access through another network. If you are on campus, sign on to UAlaska and gain access with your UA ID and password.
Step 1:
Navigate to connect.alaska.edu and log in again with your UA ID and password
Step 2:
Click on the +Advanced link to expand. Two types of certificate will be shown: Root certificate and Identity certificate. You need one of each. Download the first of each: Where it says CRT and where it says PKCS12 format.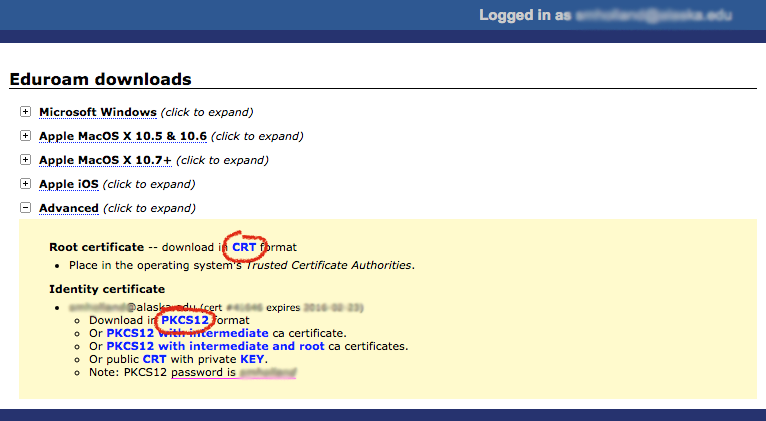
Step 3:
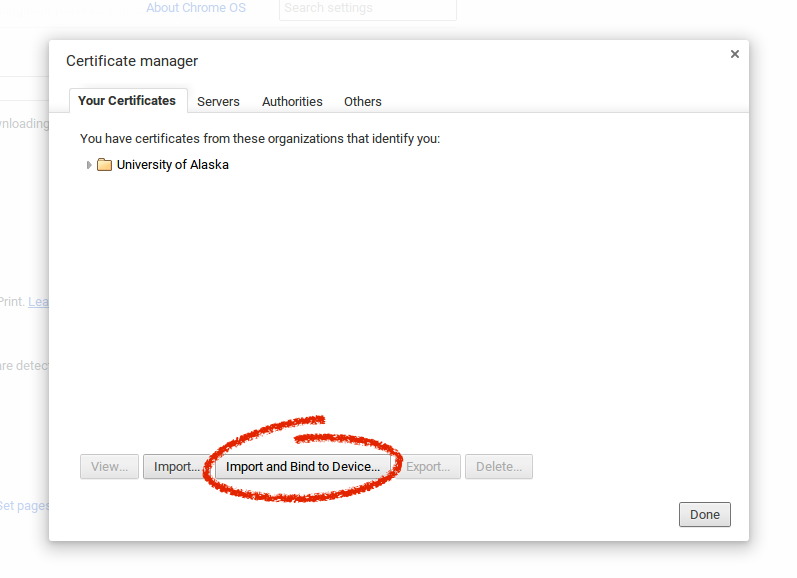
In Google Chrome, type chrome://settings/certificates into the address bar. This will open up a Certificate manager window.
![]()
Step 4: In the window, under the Your Certificates tab, click on Import and Bind to Device at the bottom.
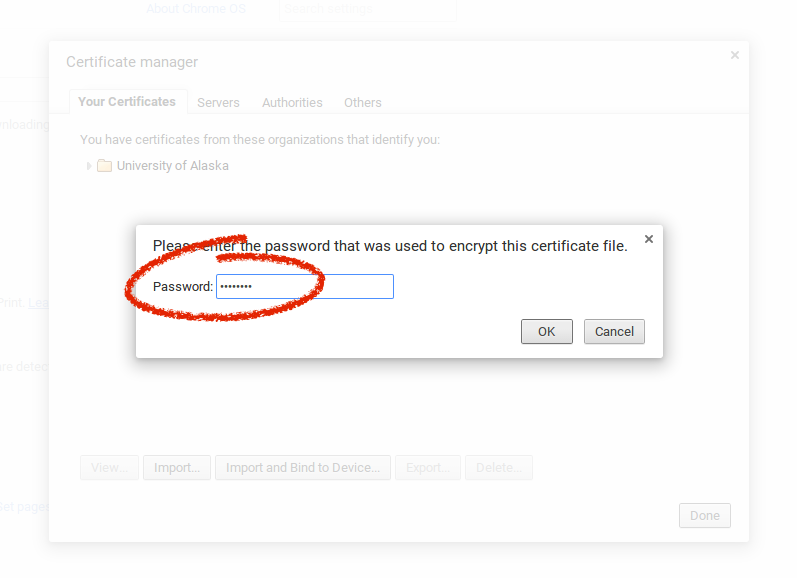
Step 5:
You will be asked to enter a password. Enter your username (before the @ mark) as the password.
Step 6:
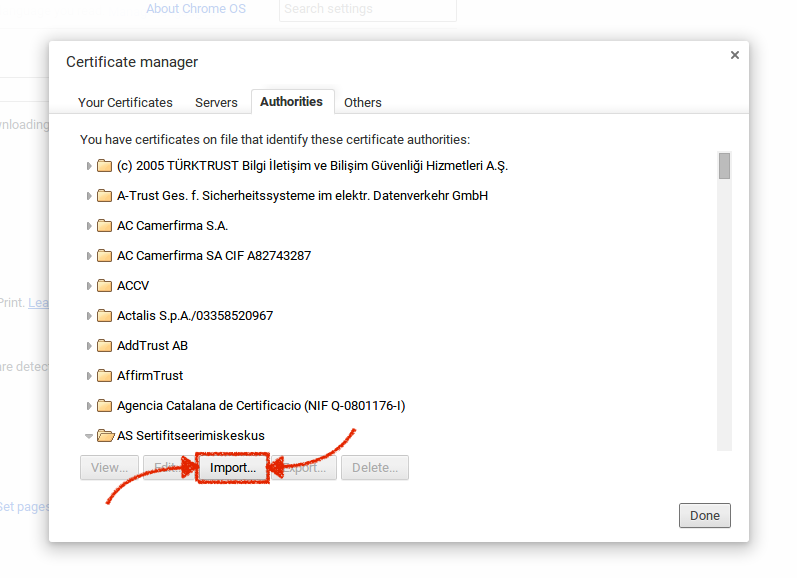
Click on the Authorities tab at the top of the window. You may see a bunch of folders and text in the window – ignore this and take a deep breath. Skim to the bottom of the window and click the Import… button. Import the other file you downloaded, rootCA.crt
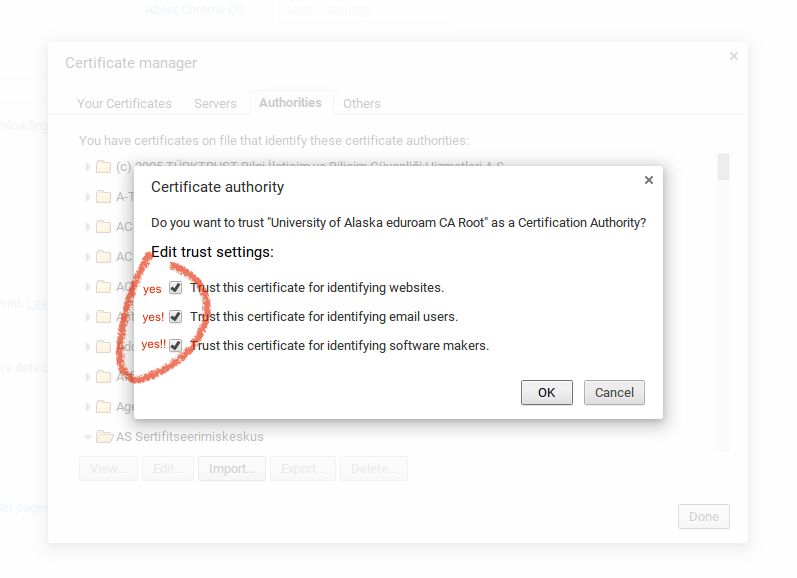
Step 7:
A window will pop up asking you if you trust that certificate. Of course you do. It’s your friend. Click all three checkboxes and hit OK.
Step 8:
Shut down your Chromebook and restart it.
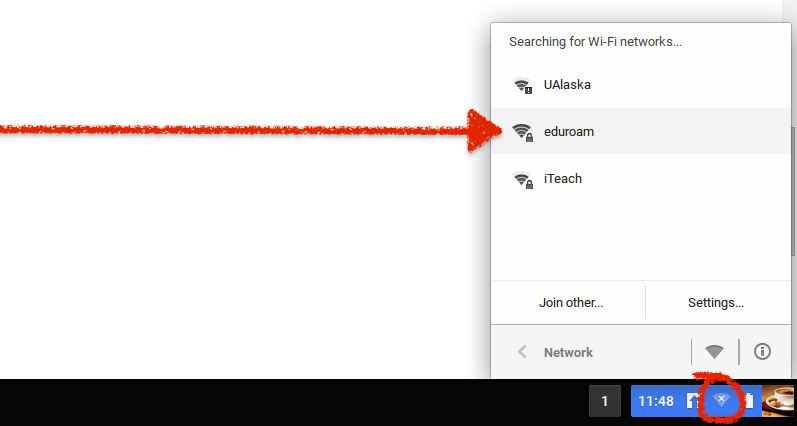
Step 9:
After booting up in no time at all, go to your network connections at the bottom right of your screen and select “eduroam”as your wi-fi network.
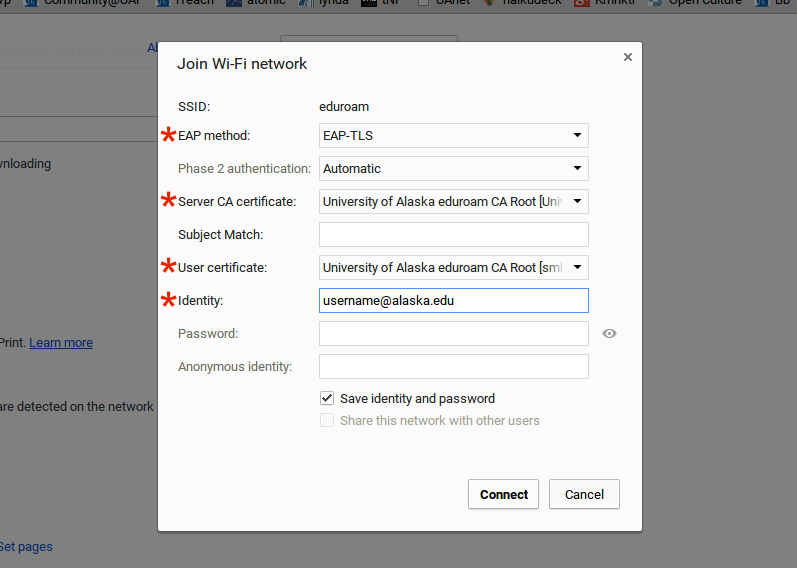
Step 10:
The final step. Before eduroam will let you into the party, you need to give it a little more. A window will pop up titled “Join Wi-Fi Network” that has several fields you need to input.
- *EAP Method: select EAP-TLS
- *Server CA certificate and *User certificate: These should already be selected. If not, select University of Alaska eduroam CA Root for each.
- *Identity: enter your full alaska.edu email address
It should look like this:
Click Connect. Welcome to the Internet.

excellent write up!